Difference between revisions of "Creating Terrain with L3DT and YATT"
Foambats4all (talk | contribs) |
Foambats4all (talk | contribs) (Flush out the "Exporting Maps" section.) |
||
| Line 151: | Line 151: | ||
<br clear=all /> | <br clear=all /> | ||
=== Exporting Heightmap === | === Exporting Heightmap === | ||
| − | '' | + | [[File:L3DTwYATT_012.jpg|frame]] |
| + | Next we want to export our heightfield, which will define our terrain's shape. To start, select the '''Heightfield''' tab, then navigate to '''Layers > Export layer...''' or use the '''Ctrl+E''' shortcut. We want to export our images as bitmap or '''BMP''' files. Select this from the drop down menu, and use the '''...''' button to specify the location of your map. You want to save this to the same directory as your alpha maps. When you are done, progress by clicking '''Next >>'''. | ||
| + | |||
| + | Summary: | ||
| + | # Select the '''Heightfield''' tab. | ||
| + | # Navigate to '''Layers > Export layer...''' | ||
| + | # Select '''BMP''' as the export '''File format'''. | ||
| + | # Click on '''...''' on the '''File name''' field, and save the .bmp file in the same folder as your alpha maps. | ||
| + | # Click '''Next >>''' | ||
<br clear=all /> | <br clear=all /> | ||
=== Exporting Specular Light Map === | === Exporting Specular Light Map === | ||
| − | '' | + | [[File:L3DTwYATT_013.jpg|frame]] |
| + | Now that we have our heightfield/heightmap, we're basically going to do the same thing for our specular light map. Follow the same steps, but for the '''Specular light map''' tab. | ||
| + | |||
| + | Summary: | ||
| + | # Select the '''Specular light map''' tab. | ||
| + | # Navigate to '''Layers > Export layer...''' | ||
| + | # Select '''BMP''' as the export '''File format'''. | ||
| + | # Click on '''...''' on the '''File name''' field, and save the .bmp file in the same folder as your alpha maps. | ||
| + | # Click '''Next >>''' | ||
==== Tweaking Specular Lights ==== | ==== Tweaking Specular Lights ==== | ||
| − | + | By default the specular light map is rather dramatic. Open it in your favorite image editing program, such as [http://www.gimp.org/ GIMP] and add a white layer above it, at 75% or so opacity. You may want to come back to this file later to tweak it. | |
<br clear=all /> | <br clear=all /> | ||
| + | |||
== Creation with YATT == | == Creation with YATT == | ||
''Coming soon!'' | ''Coming soon!'' | ||
Revision as of 19:16, 1 August 2014
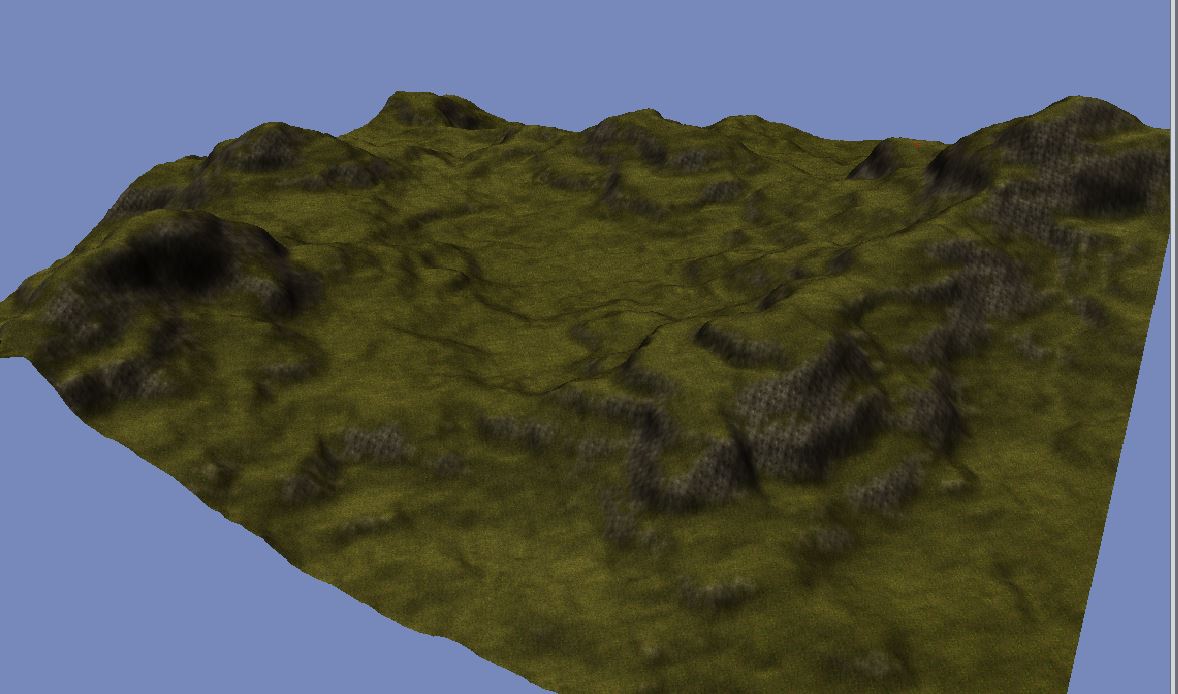
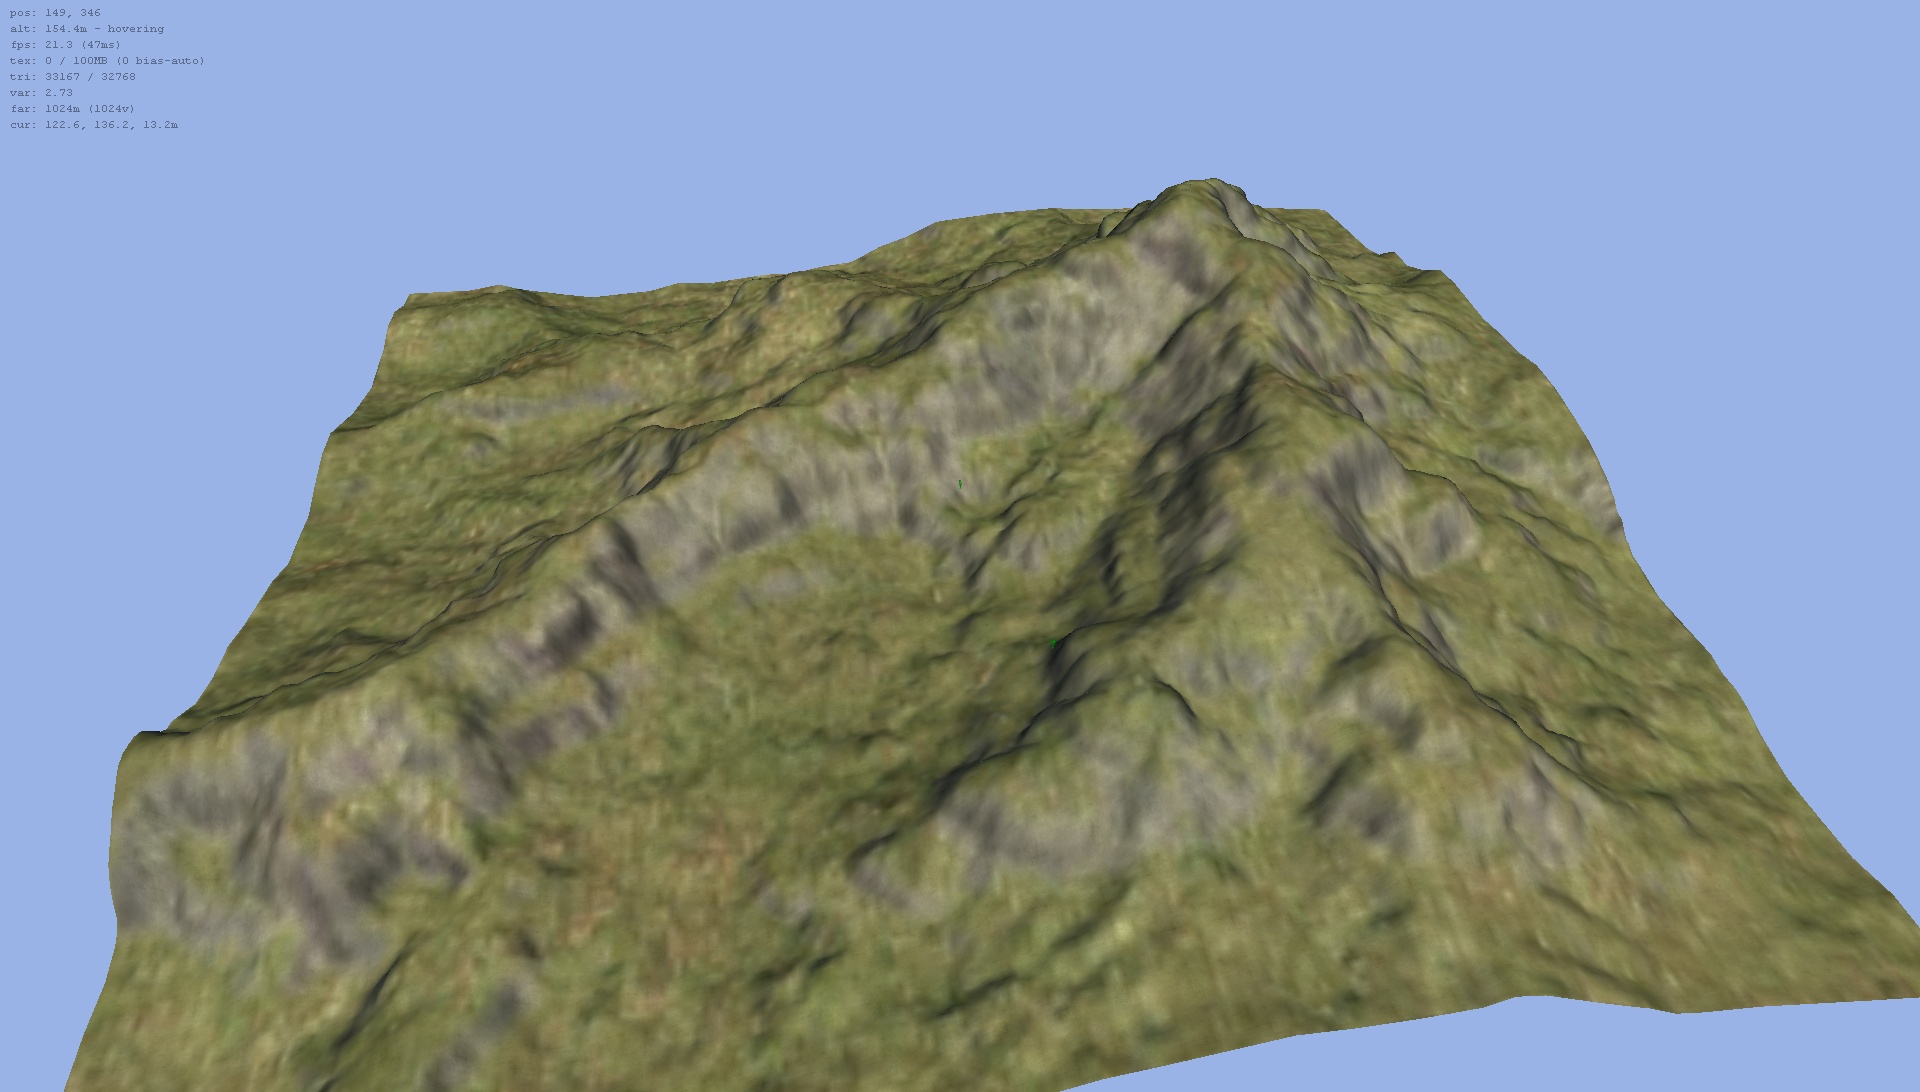
One of the most taxing tasks of creating a new exterior area is the manual manipulation of terrain. Using the popular program Large 3D Terrain (L3DT) Generator and a toolset plugin, we can create realistic terrain with minimal effort. An example terrain as seen in the Toolset can be seen to the right.
This document will help guide builders to use these tools for Neverwinter Nights 2.
Contents
Prerequisites
If you have not already done so, follow the steps for setting up an ALFA Build Module, including enabling third party toolset plugins.
Large 3D Terrain Generator
Download L3DT Standard Edition. Preferably get the latest beta, but if you encounter issues using it, try switching to the stable release. Install it using the on-screen instructions.
Yet Another Terrain Tool
Download Yet Another Terrain Tool. Once it is finished, open the archive and extract the file to <NWN2 Install Directory>/NWN2Toolset/Plugins.
Generation with L3DT
- For a more complete introduction to L3DT, see L3DT User Tutorials
In this example we will be making a very simple terrain using L3DT. To get started, open L3DT and create a new project using File > New project.
Project Type
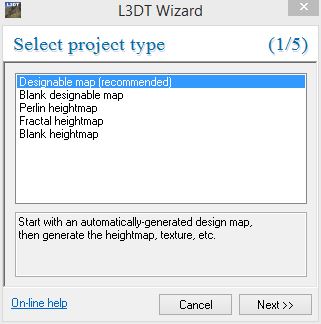
Our first window in L3DT lets us determine what sort of project we're making. Typically, you will want either a Designable Map or a Blank Designable Map. A blank map will let you detail the world by hand, while the first option will generate the map for you based on various parameters. In this tutorial, we will be using Designable Map. Make sure this is selected, then click Next >>.
Summary:
- Select Designable Map
- Click Next >>
Heightfield Size
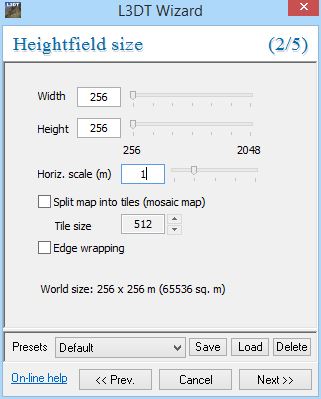
Next, we want to specify the size of our heightfield. A heightfield is the image used that provides vertical depth, or height, to a terrain. The YATT website provides minimum resolutions to use for these heightmaps, copied below. In this example, we will be making a 24x24 external area. By using the chart, we see that our minimum size for a 24x24 area is 241px by 241px. However, we want to always round up to the next multiple of 16 for the next step, so we will be putting in a value of 256 for both. In Neverwinter Nights 2, 1 map unit is 1 meter, so we will use a Horizontal Scale of 1.
| Area Width | Heightmap Size | Area Width | Heightmap Size |
|---|---|---|---|
| 4 | 128 | 20 | 224 |
| 8 | 160 | 24 | 256 |
| 12 | 176 | 28 | 272 |
| 16 | 208 | 32 | 304 |
Summary:
- Set both Width and Height to 256.
- Set Horizontal Scale to 1.
- Click Next >>
Design Map Size
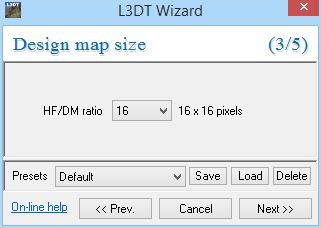
The design map lets us place or tweak features, and and thus determines general terrain detail. This is mostly important if we want to tweak our map, or are generating one by hand. For this example, we're going to err on the side of detail, and select a value of 16.
Summary:
- Select 16 from the drop down box.
- Click Next >>
Design Map Parameters
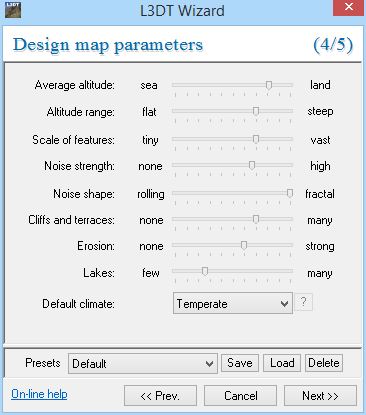
While most of the screens are fairly simple, this is where you actually have the most input on how your terrain will come out. Play with these dials, experiment, and see what you like best. With this you can make rolling plains, frosty crags, or islands.
Summary:
- Play around! Don't be afraid to try new things, you can always make a new map.
- Click Next >>
Calculation Queue
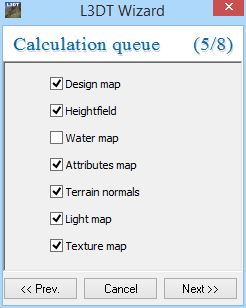
In this next step, we define just what we want to create. For our purposes, we will check everything except for Water map.
Summary:
- Check everything except for Water map.
- Click Next >>
Light Mapping (Part 1)
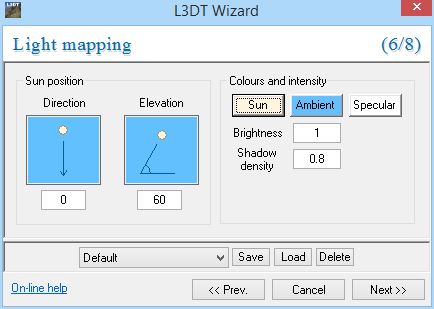
This is another window we will simply click through. Should you wish to get advanced, here you can control the angle of our lighting, which we will use later to make specular maps. These maps will translate to color maps for our terrain, which will provide far nicer details.
Summary:
- Click Next >>
Light Mapping (Part 2)
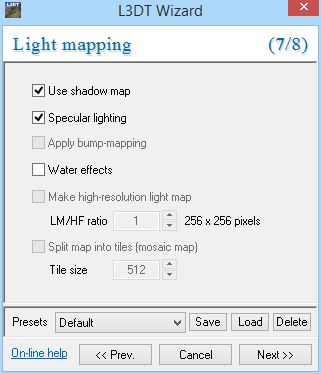
Yet another simple page. Here, we are specifying the details for generating what we described above. Since we are not generating water in this example, be sure to uncheck Water effects.
Summary:
- Uncheck Water effects
- Click Next >>
Texture Settings
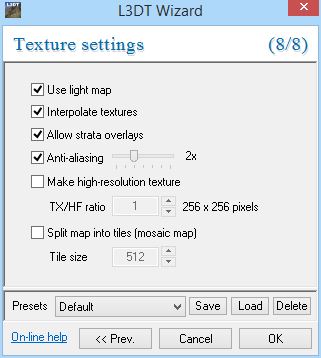
Our final bit of generation in L3DT prior to exporting will be the creation of our textures. For now, the default settings work out just fine.
Summary:
- Click Next >>
Finalizing Generation
After L3DT generates everything for you, take a look around. This is your chance to make sure what you made is something worth creating. Due to the random nature of L3DT's generation, not everything will be suitable for a NWN2 area. You will want to keep in mind that the center of your map is where the players will be, so you will want to make sure everything looks manageable.
You can click the View map in 3D button on the toolbar to take a look around. Control your camera using W, A, S, and D to move around. Use R to lower the camera, and E to raise it.
Do not worry too much about texture quality, as we will not be using L3DT's textures directly. When you are happy with what you have, progress to the next step.
Exporting Maps
Now that we've generated our fancy terrain, we need to cut out the parts that the toolset can use. These exports, maps, are image files that represent details on the terrain. A heightmap may be a grayscale image, where lighter shades represent higher altitudes, while darker shades represent depth. You can see some of these maps by clicking the tabs.
Creating Alpha Texture Maps
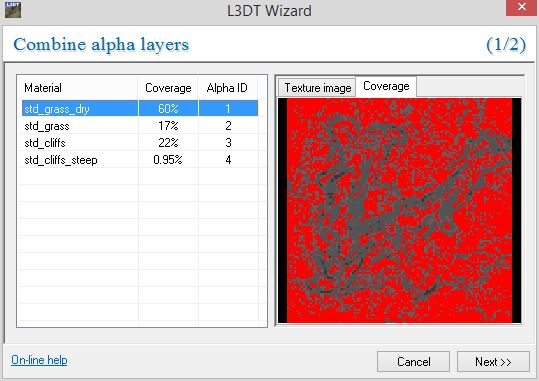
First, we need to generate alpha texture maps. These maps tell YATT where and at what pressures there are textures. You will get one map for each texture used. To get started, navigate to Operations > Alpha maps > Generate maps... Here you will want to note down the order and textures used. In this example, we've have layers 1 and 2 being grasses, with 3 and 4 being cliff textures. Note these down for later, then click Next >>.
Summary:
- Navigate to Operations > Alpha maps > Generate maps...
- Note down the relationship between the numbers and what kind of texture it relates to. E.g., 1 goes to grass, 4 goes to cliffs.
- Click Next >>
Exporting Alpha Texture Maps
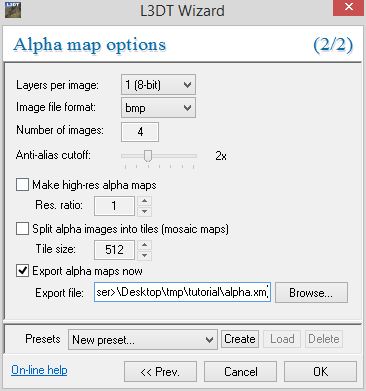
On the next page, you will want to check Export alpha maps now and save the .xml file where you will be exporting your maps. If you went through more detailed textures, you may want to change some settings here.
Summary:
- Check Export alpha maps now.
- Save the .xml file into a folder to use later.
- Click Next >>
Exporting Heightmap
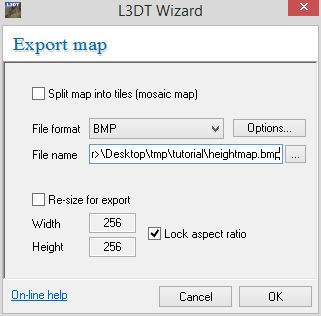
Next we want to export our heightfield, which will define our terrain's shape. To start, select the Heightfield tab, then navigate to Layers > Export layer... or use the Ctrl+E shortcut. We want to export our images as bitmap or BMP files. Select this from the drop down menu, and use the ... button to specify the location of your map. You want to save this to the same directory as your alpha maps. When you are done, progress by clicking Next >>.
Summary:
- Select the Heightfield tab.
- Navigate to Layers > Export layer...
- Select BMP as the export File format.
- Click on ... on the File name field, and save the .bmp file in the same folder as your alpha maps.
- Click Next >>
Exporting Specular Light Map
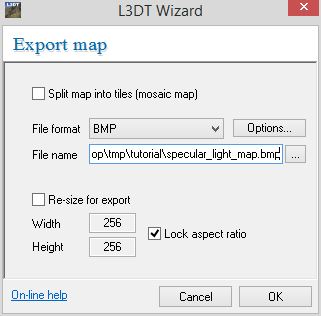
Now that we have our heightfield/heightmap, we're basically going to do the same thing for our specular light map. Follow the same steps, but for the Specular light map tab.
Summary:
- Select the Specular light map tab.
- Navigate to Layers > Export layer...
- Select BMP as the export File format.
- Click on ... on the File name field, and save the .bmp file in the same folder as your alpha maps.
- Click Next >>
Tweaking Specular Lights
By default the specular light map is rather dramatic. Open it in your favorite image editing program, such as GIMP and add a white layer above it, at 75% or so opacity. You may want to come back to this file later to tweak it.
Creation with YATT
Coming soon!
Touching up Details
Coming soon!
