Basic Overview
I. Create the color map
II. Place the houses
III. Terrain and Texture
IV. Cut the walkmesh
Step by Step Tutorials
_____________________________________________________________
I. COLOR MAP
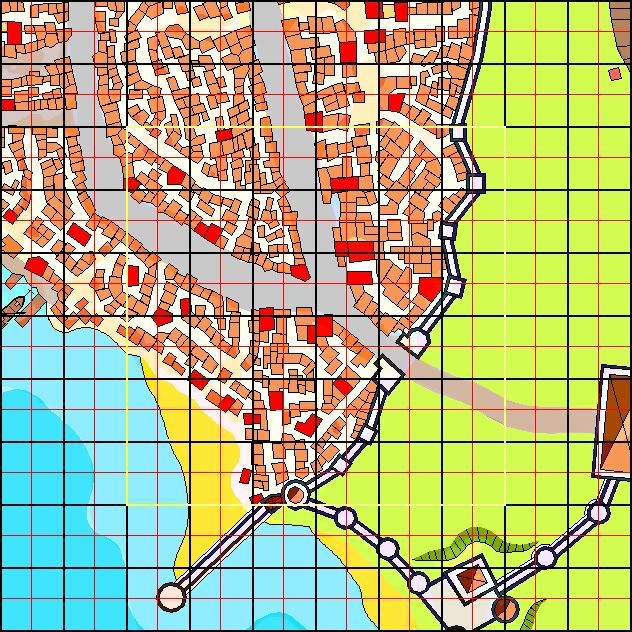
1. Decide wihich size exterior area you will use and look at the grid/occlusion grid.

2. Using and imaging program like Paint.net or Photoshop, take your map and draw a grid over it. The grid should be exactly like the grid in the toolset. (Black, red and white lines).
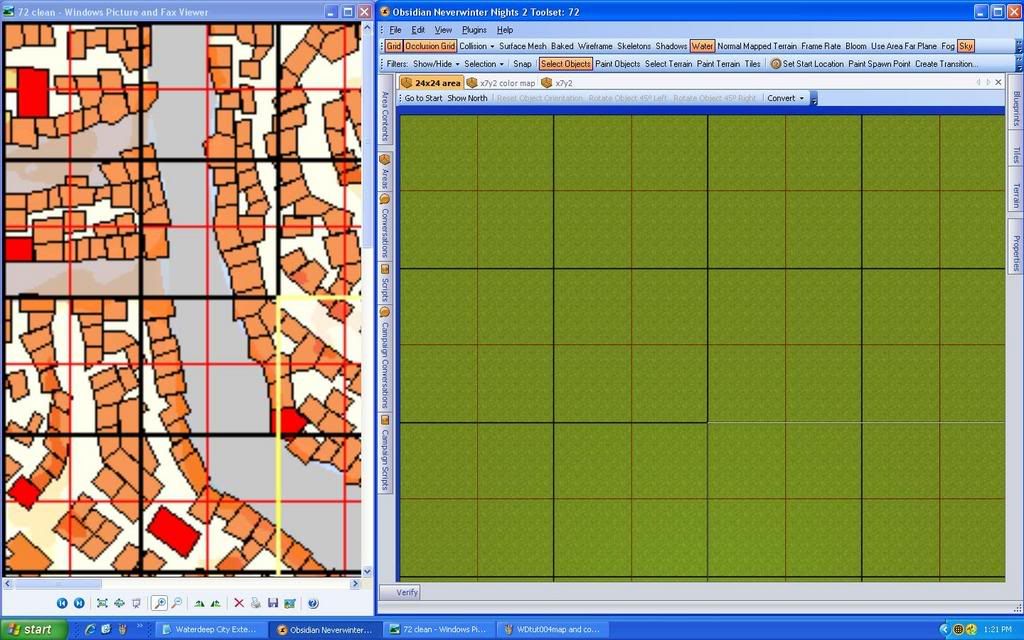
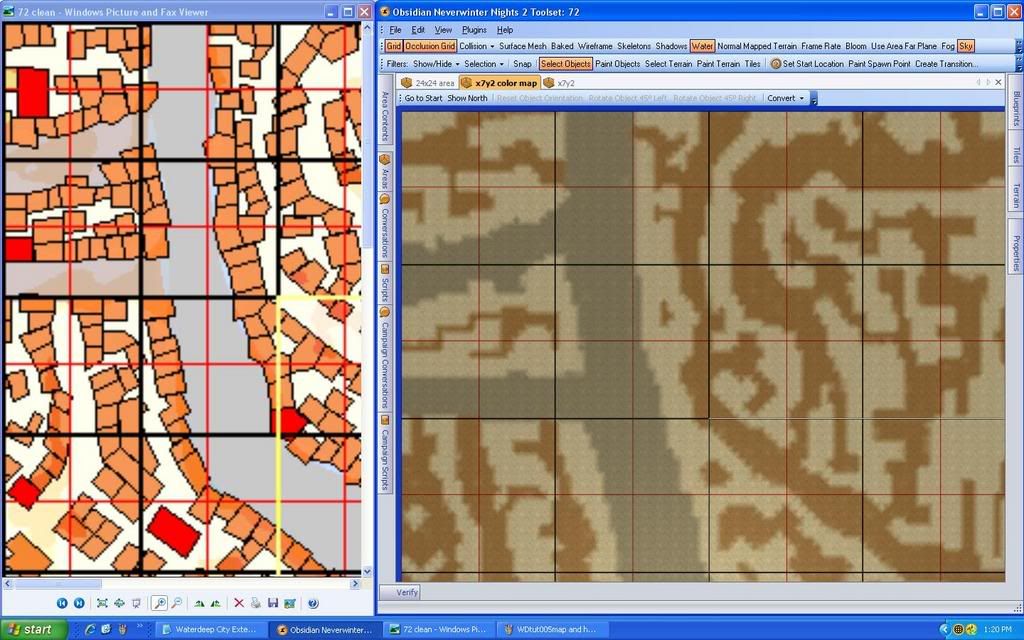
3. Open your gridded map image and the toolset and resize the windows so that both fit on your screen.
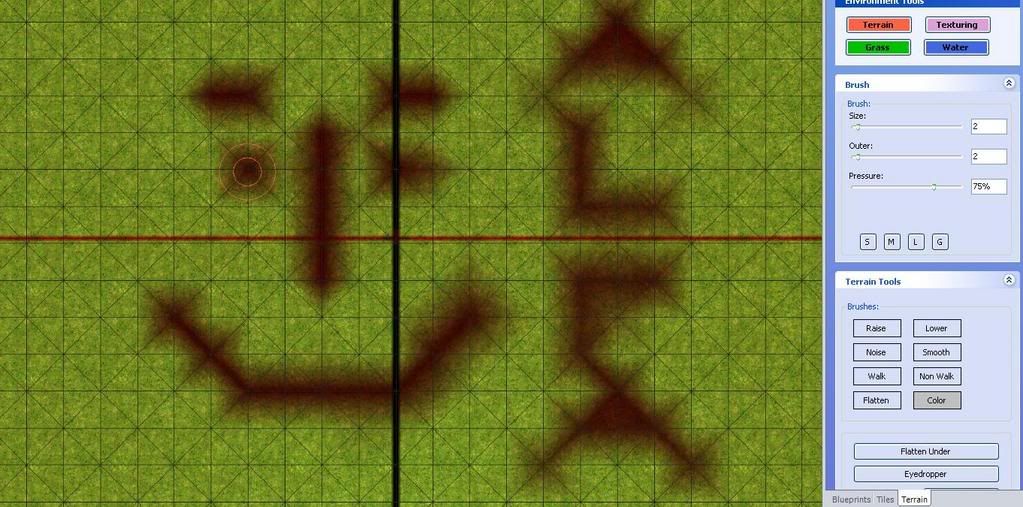
4. Turn the Surface Mesh on. Using a small brush (Size2, Outer 3) and 100% intensity begin in one corner of your area and lay down colors for the roads, water, and specific landmarks. Do not color under houses. Just leave them the base default texture. Do this square by square. If you make a mistake use the color white which acts like an eraser.
It took me three hours to finish just the color map for this 24x24 area. The base default texture is TT_GR_Sand_01 - color shows up
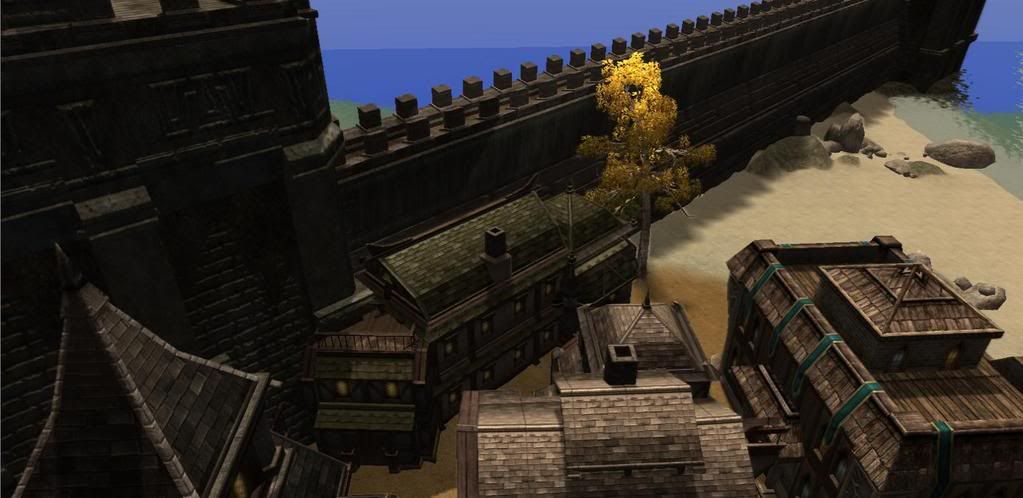
well over it. Color selection: I used grey for the main cobblestone roads, brown for the dirt roads, black for
the city walls, yellow for the beach, aqua for the water. Yes it takes some patience but later there will be
little room for error when placing the houses.
NOTE: The color tool uses the walkmesh. It colors a small circle over the intersections of the walkmesh
lines. Inevitably you will have little triangles in the color map. Don't become frustrated by this. Although
the color map should be as exact as possible to the original gridded map, it is still just a guide for placing
houses.
- Image and blank area - resized windows side by side
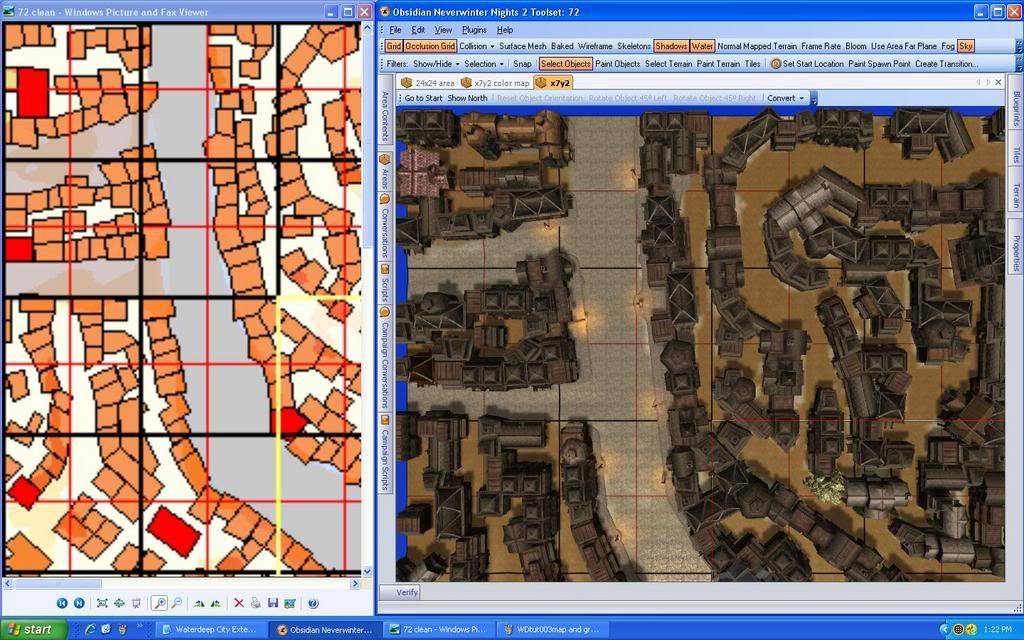
- Finished Color map
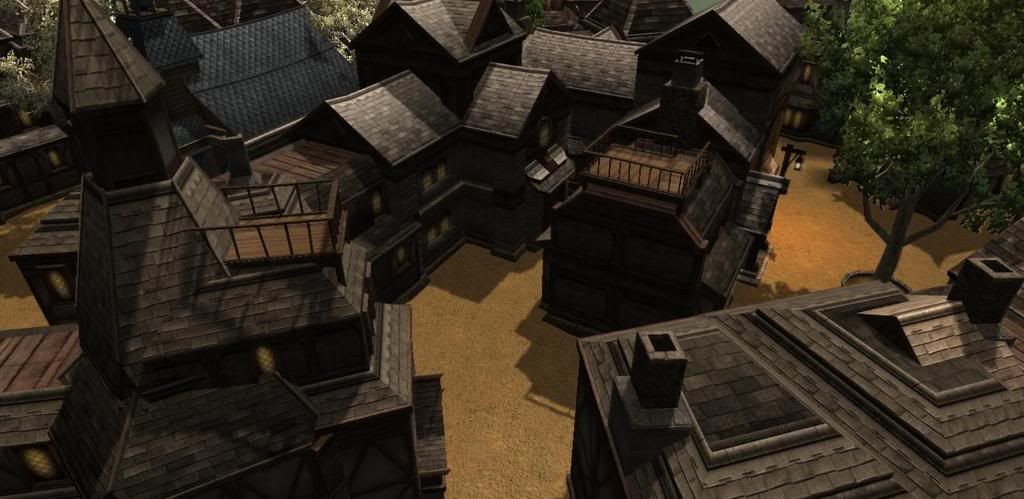
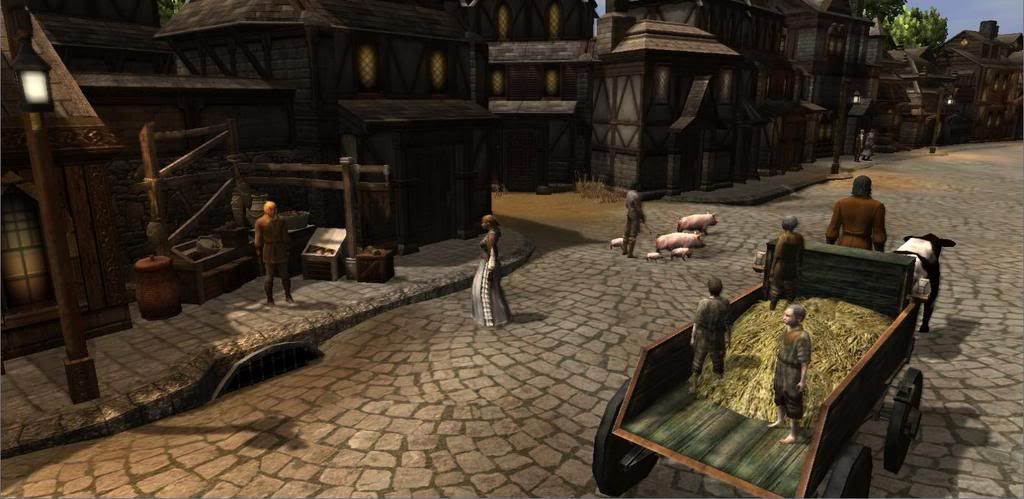
- Finished Laying down Houses
_____________________________________________________________
II. HOUSE PLACEMENT
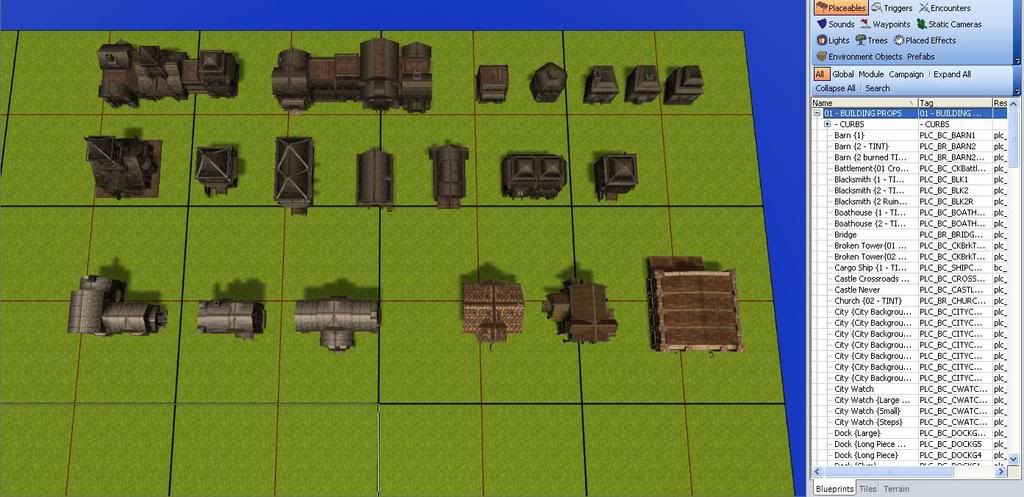
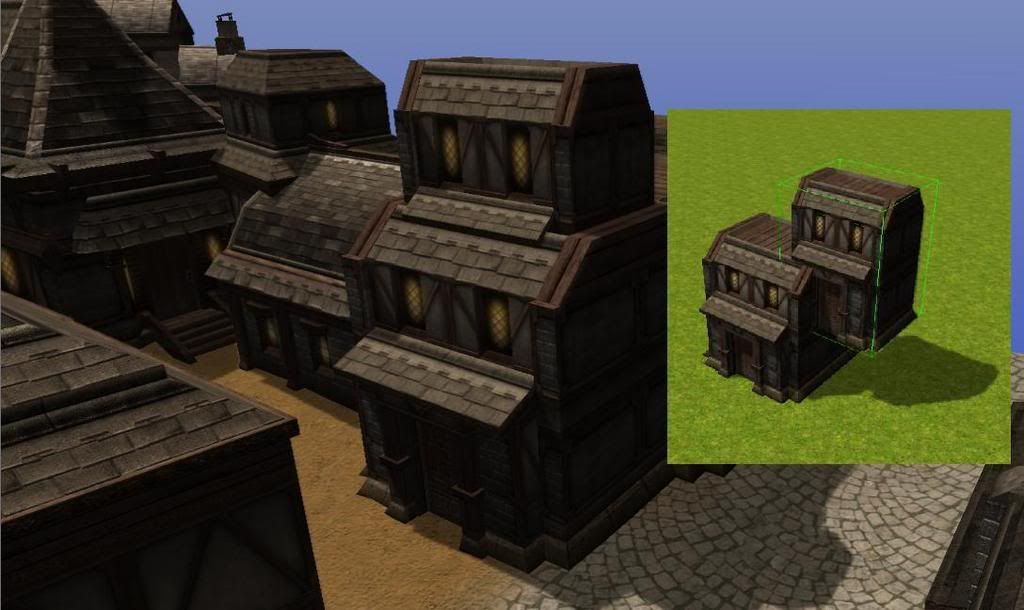
1. In a corner of your grid place down one of each of the houses you will be using. For Waterdeep South and Dock Wards that mostly means Dock Row Houses along with Inns, taverns and merchants, and maybe just a couple estate houses.
2. Select all the models and convert to environmental. This needs to be done to reduce the size of the mod and help with lag problems. Use copy/paste (CTRL+C / CTRL+V) to begin placing your houses in the area.
NOTE: Everytime you convert a placeable building with doors to environmental the doors disappear!!! This will happen when you switch your models to environtal. It is a royal pain in the @$$. But when you copy/paste from the doorless environmental models the new building will once again have doors and it will still be set to environmental. This concept is very important because if you place 300+ houses that are still set to placeable and then you convert them all to environmental you wil suddenly be missing around 1000 doors! On a smaller scale there are tricks to get around it. This is what works best for me....
TIP: To get back lost doors on a building you have already placed into an exact position.
-Set the height and position to TRUE.
-Click on ground to deselect the building.
-Click on building to select it.
-CTRL + C to copy
-Delete the building (Delete button)
-CTRL + V to paste
-Set the height and position of all doors on the model to TRUE (locked)
3. Once you have a house in place exactly where you want it, Hold down the SHIFT button and also select the doors then lock both the height and position by selecting TRUE in the properties. Clicking only on the house will not select the doors because we are working from a copy/paste set to environmental. For me what works is doing this AS YOU GO. Copy/paste from the model, position the build, with shift also select the doors, lock the position and height. I know people will say, why not just wait until you have a large section completed - select everything and lock the height/position for the whole group of them. Well the first problem is the toolset often crashes when you select a really huge number of objects - at least on my computer. The second problem is that if the toolset crashes before you can height and position lock the doors, when you reopen the area you will be missing doors. Like I said with only a few houses it isn't hard to deal with, But with hundreds of houses you will really regret it. See last TIP I posted above, about how to get back lost doors? Imagine doing that for hundreds of individual houses - one by one!!! If your computer can handle selecting a ton of houses and doors then go ahead and work in larger groups but beware the crashes!
4. SAVE - Have the auto save on OR save often. Again the problem for me is crashing. Of course with a crash you lose what you did since the last save. With hundreds of houses you likely won't remember which exact buildings you already height/position locked before the crash. So once again I copy/paste from the model, position the building exactly as I want it, hold shift down and click on each door to add them to the selection, lock the position and height of everything in the properties and SAVE very often.
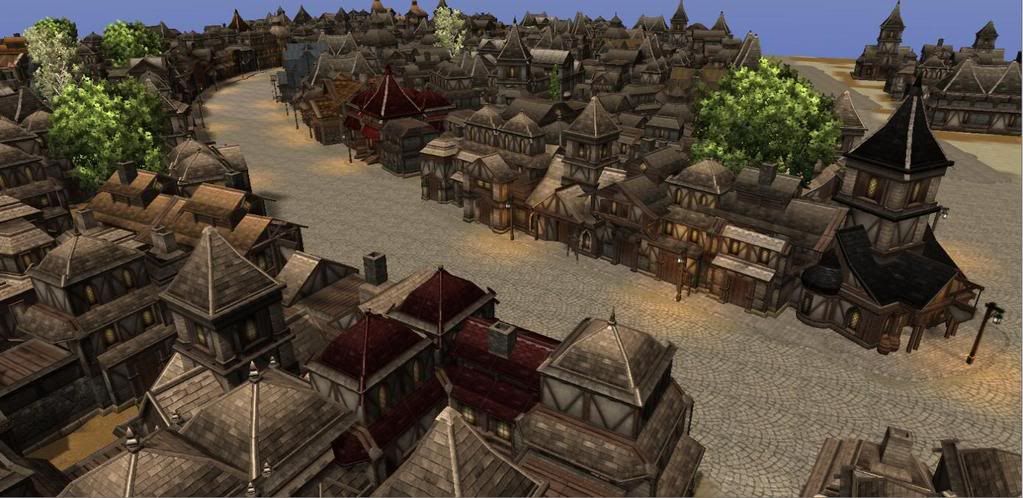
5. Variety - There aren't that many models to work with unfortunately - so get creative with resizing, combining houses and tinting to create more variety. Finally add other placeables , trees and creatures.
Variety examples:
- Use the same tint on a group of buildings to make it look like one single building.
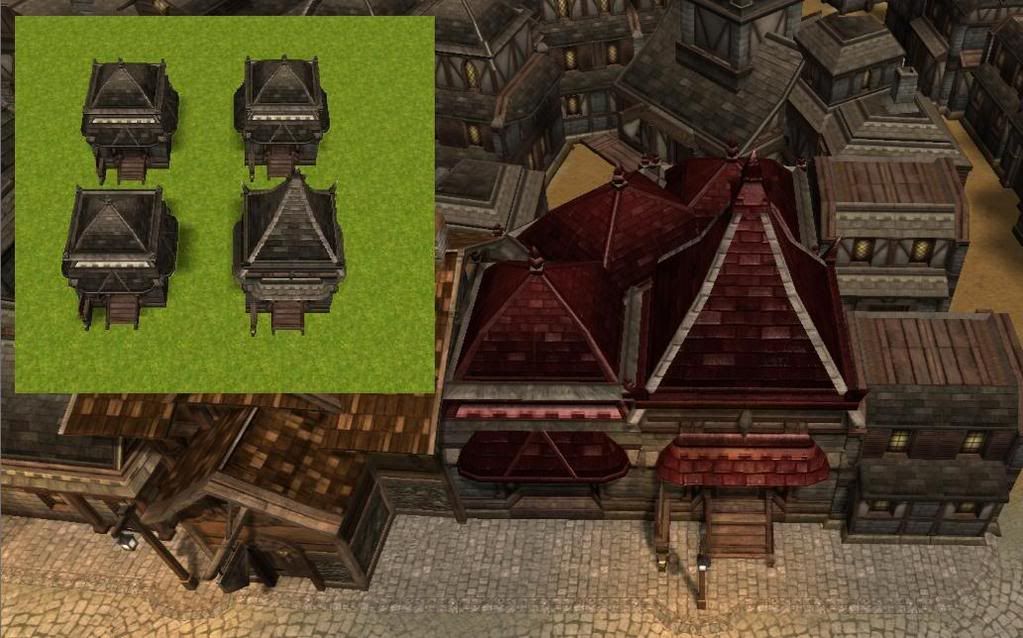
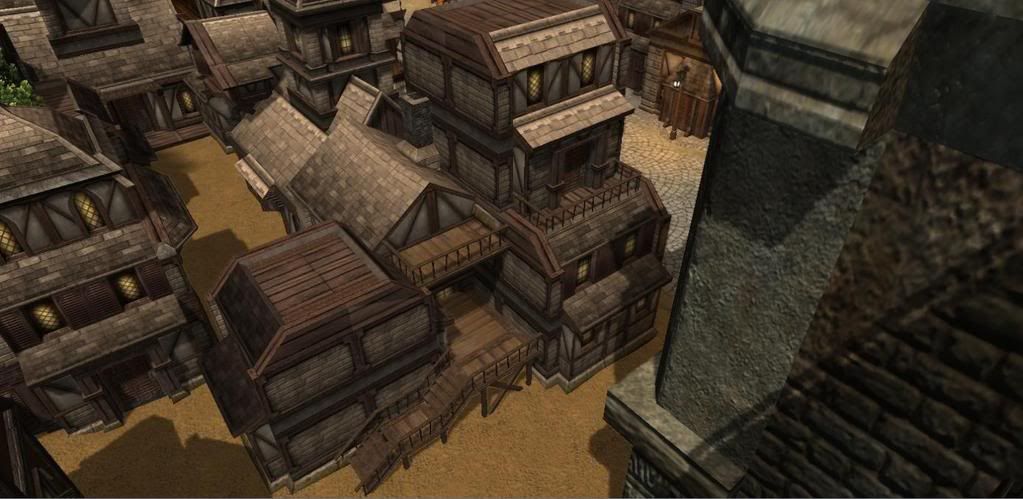
- Resize and combine buildings
- Definitely add tinting to the landmark buildings to help them to stick out. Otherwise the PC will have to scroll over hundreds of doors to the useable ones.
TIP: With any wooden shingles in a seaside town, the salt and inclement weather will take their toll and you will see mostly faded tones. PLEASE do not use the pure colors from the color picker!!! Select the color you want and then move the selector circle to the left toward the greys - and choose a slightly faded tone of that same color. This is especially true of black! (side note - it also applies to NPC hair color and clothing tinting)
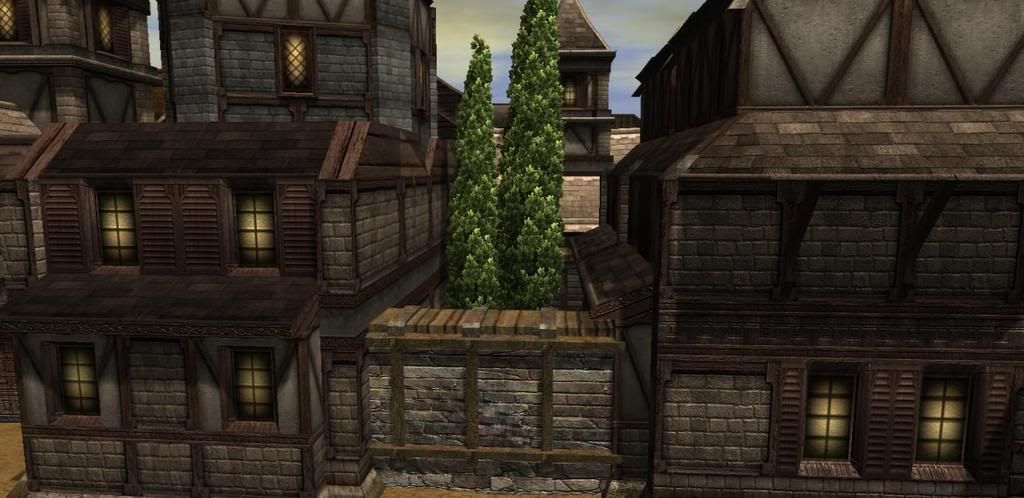
- Add interest with balconies, small walled/fenced yards and trees
___________________________________________________________
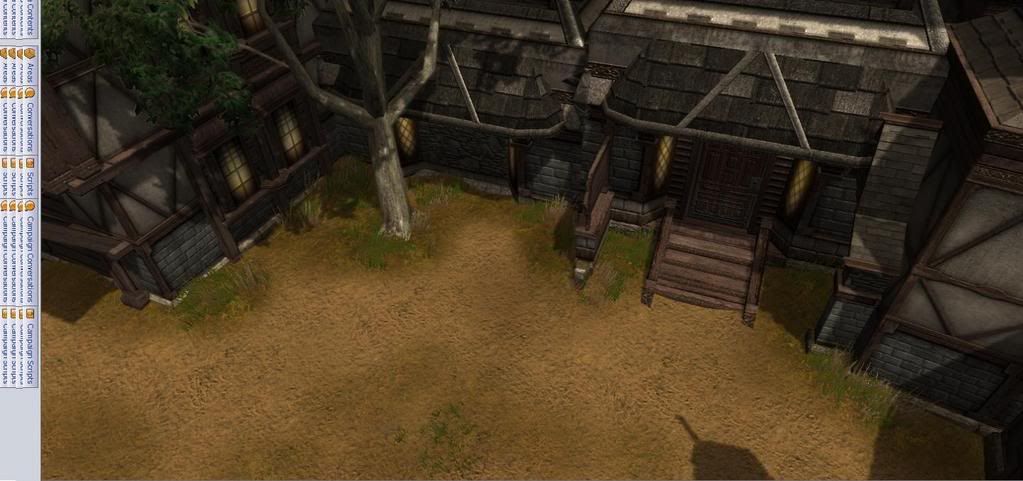
III. TERRAIN and TEXTURE
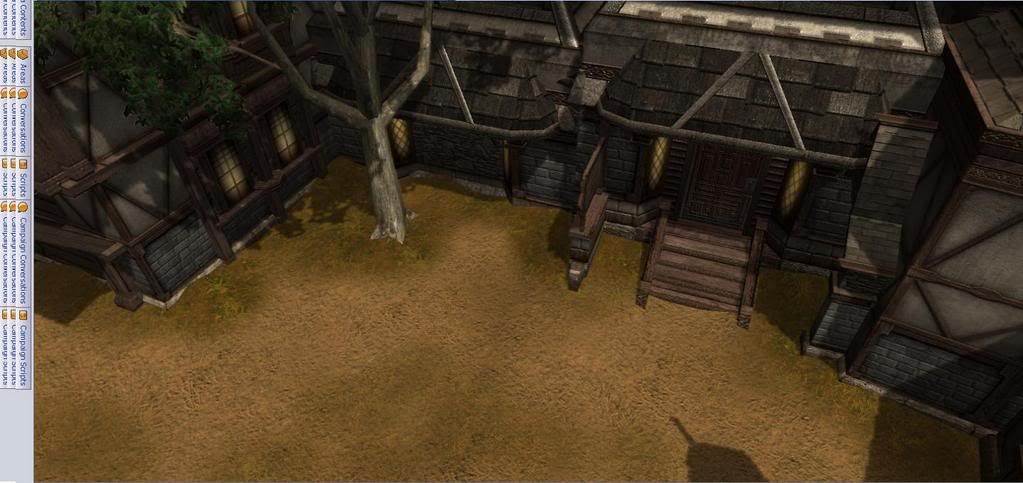
1. Raise/lower terrain - No terrain is completely flat. Variety adds realism. This is the most is a painstaking step for me. And as you can see from the screenshots I am far from finished terraining and texturing the area. First off before you raise the terrain under houses they must be height locked. If they are not heightlocked they will raise up off the ground with the terrain. This is why we took so much time in the previous steps to height and position lock. Use a small brush (and a very low percentage of pressure (less than 10%) go around each and every house and irregularly raise the ground along the foundations. After that, irregularly lower the centers of the streets and along curbs to make gutters. Add a few pothole like depressions too.
2. Add texture - Add a darker texture along the base of the houses in an irregular pattern, first with a light pressure (less than 50%) and then a few darker patches 75% pressure and finally some. I used a dark grass texture around the houses.
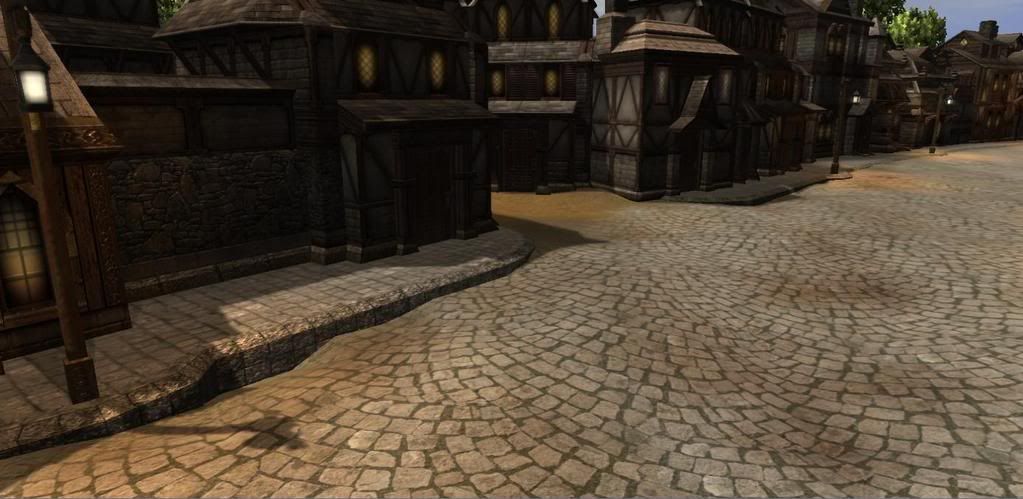
3. Add color - The base texture for the entire area is grey sand but when I made my color map I painted the dirt roads brown. The brown you see is actually a light brown color painted on top of the grey texture which I
left from the color map. I then took the next darkest shade of the same brown from the color palette and painted a few darker patches. Again, keep it irregular but darker as you get cloer to the base of the house and the most darker in corners, hard to reach places.
The same applies for the streets - add darker tones of coler along the gutters and potholes.
4. Add grass - Remember to use grass very sparingly - it increases mod size drastically!
5. Add placeables and creatures.
- 0. Flat area

- 1. Raise/lower terrain
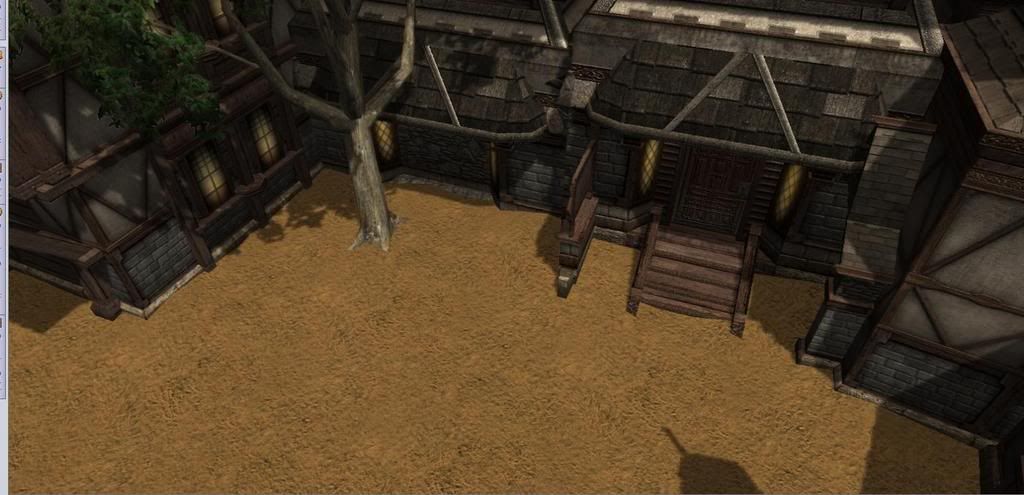
- 2. Add texture

- 3. Add color
- 4. Add grass
- 5. Add placeables and creatures

- 1. Flat street
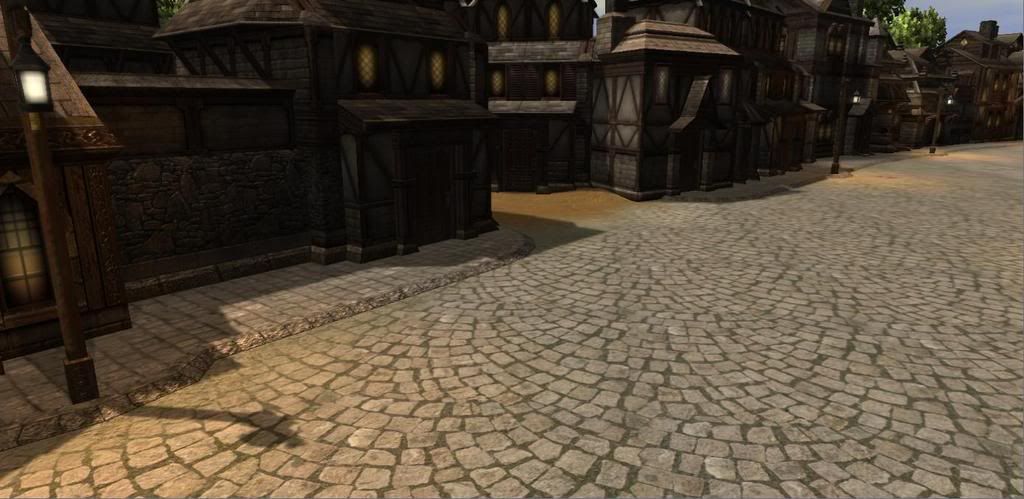
- 2. Raise/lower terrain
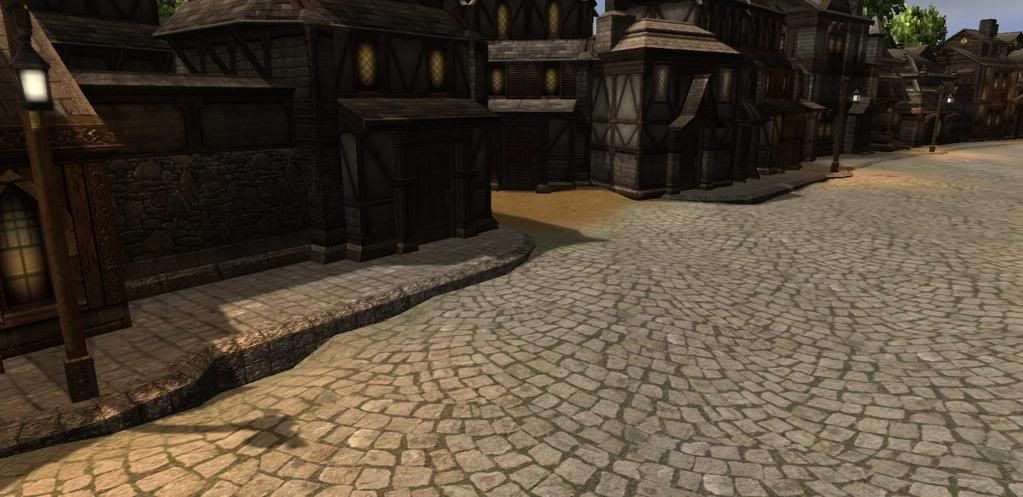
- 3. Add color
- 4. Add placeables and creatures
_____________________________________________________________
IV. WALKMESH
((Sorry no time to finish today...to be contuinued))