Having recently embarked into the world of NWN2 interior design I found myself frustrated by the huge size of the interior tiles. Hallways that have to be 20 feet wide? Staircase tiles that totally limit your building options. Rooms too damn big to fill up with placeables? Well I have been experimenting with possible solutions. Here is the first of a series of interior design tutorials with the goal of bringing the most realism possible into your mods.
Here is a standard interior (Thanks to PL). While indeed it is very well done and we can appreciate the time that has gone into building it, it is faced with the usual limitations of the toolset. Rooms are two wide with no way to divide them up in a realistic manner. Due to this problem the placeables look too spead out and far apart.

Think for a second what it would be like to actually live in this room. Remember it is all in the realisitc details. Let's say you are hungry and prepare something on the table, chop and dice some fruits? and into the skillet. You then have to walk 20 feet to the stove and cook it and then another 20 feet back to the table to eat. So you enjoy your delicious meal of curried fruit while you look at the beautiful face of your lost love in the painting before you. Then you realize there is no place to wash the dirty dishes so you just leave them there. Your tummy is full and you feel like a nap so you trudge 40 feet to the bed. Well it is the middle of winter - it is too bad that the fireplace is so far away from your bed - and damn the draft from the window is freezing cold - oh and to top it all off there is no blanket! Yikes you can't sleep - so you get up and grab a book from the shelf and you go over to sit by the fire. Could these chairs be any harder and more uncomfortable? Boy do you wish you had at least a throw pillow to sit on. Of course I'm joking around - but my point is that to create a truly immersive and convincing world we need to come as close as we can to mimicking reality within the limits given by the toolset.
One good way to do this is to create small areas like PL did in this example. You can see a definite dining area, the sleeping area, the inviting fireplace sitting area, a somewhat ill-equipped kitchen area and a then boxes and kegs spread out around the room (what could be a storage area).
If we had dividing walls to set off distinct areas this would all become easier and more realistic.
How to make DIVIDING WALLS for the standard interior tilesets.
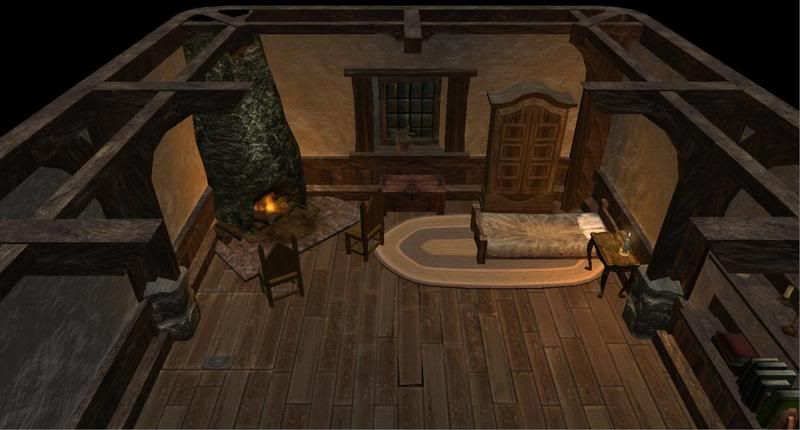
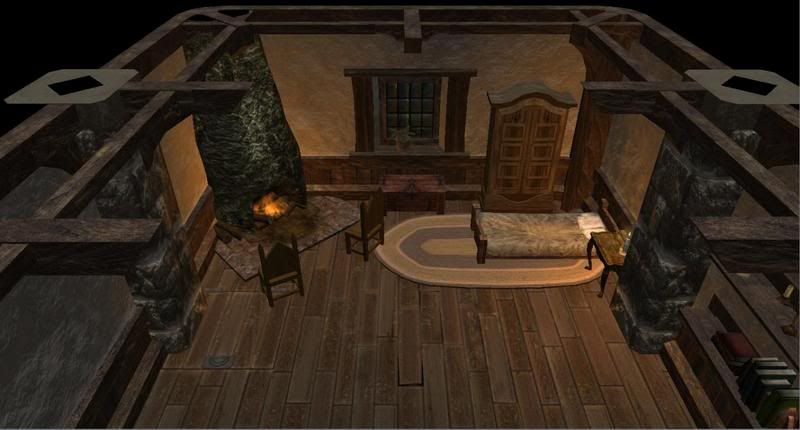
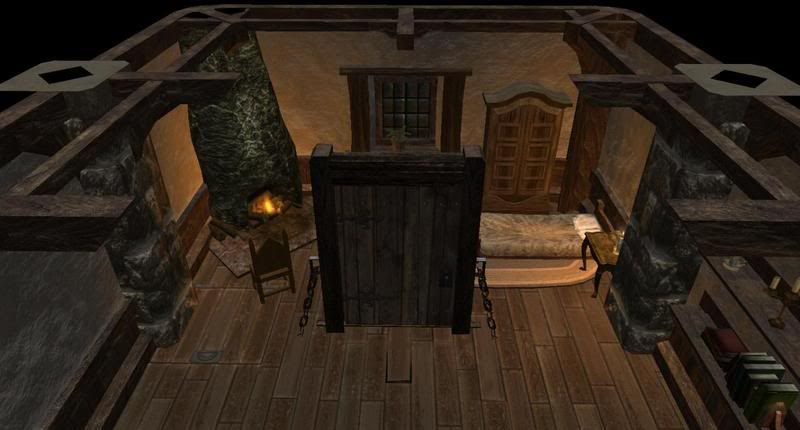
First off I grouped the furniture in the bedroom in a close knit cozy pattern.
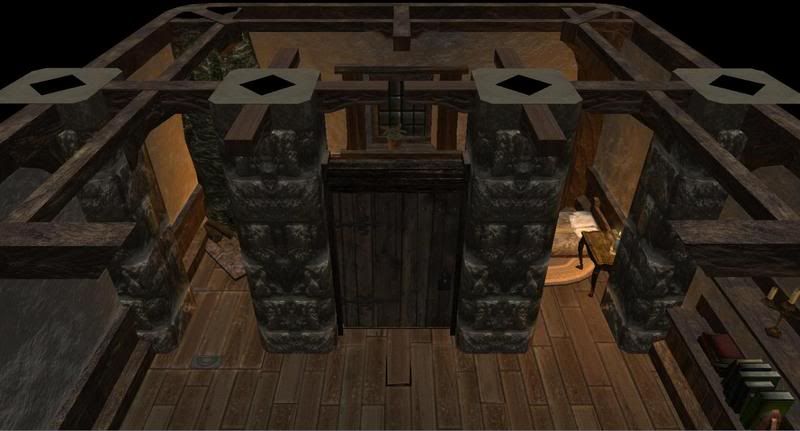
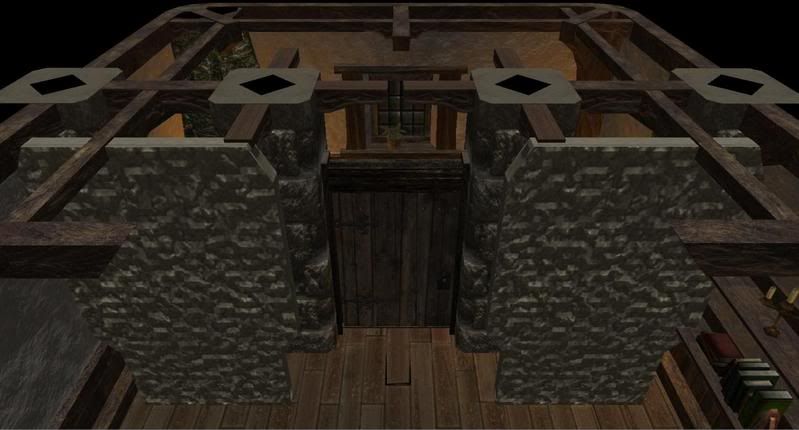
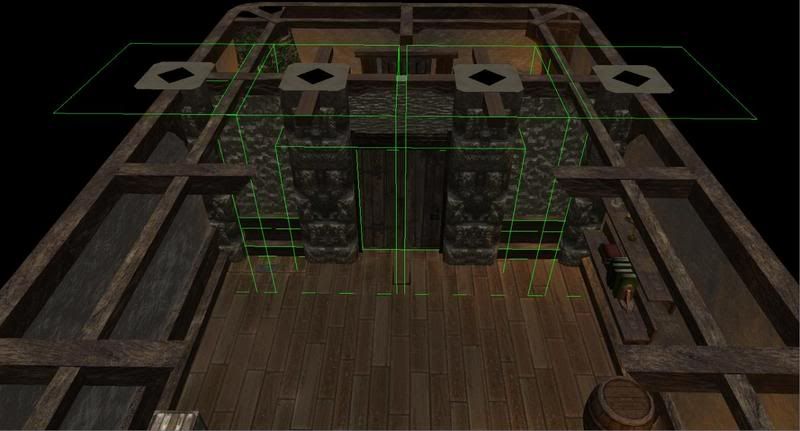
Add two Pillar #2's - lining them up with the ceiling rafters
Place a door in the very center - raise the door to .035 on the z-axis and heightlock
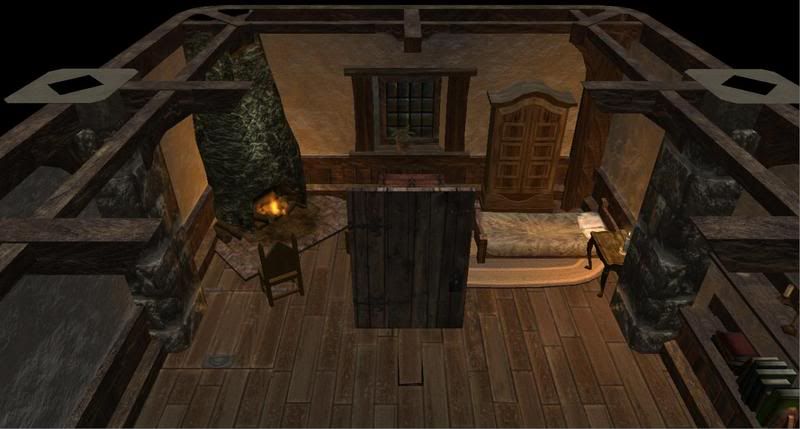
Place a Small Stockade
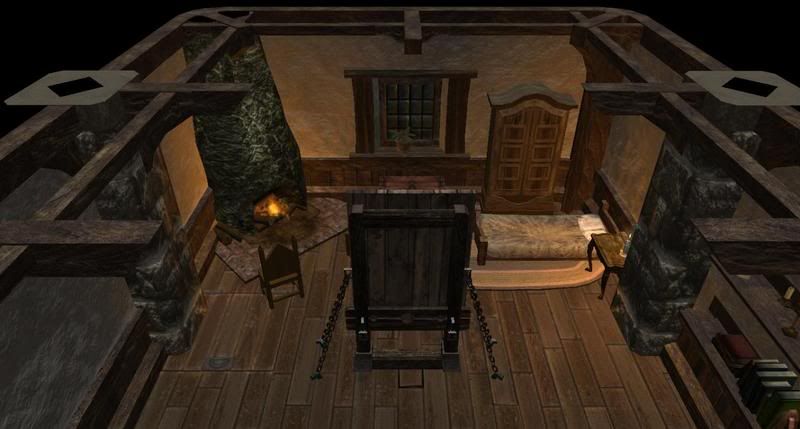
Scale the Stockade (1.55, 2, 1.85) move it over the door and lower it on the z-axis to -2.13 and heightlock it
Add two more Pillar #2's along the sides of the (stockade) door frame
Add two Archives
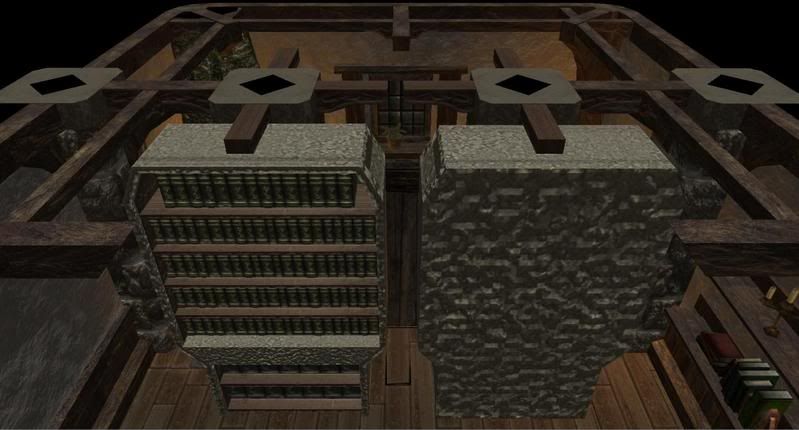
Scale the archives (1, 0.2, 1.03) and place both archives face to face and overlapping - and then group them
Copy/paste the archive group and remember to group the two new archives together
Place the "archive walls"
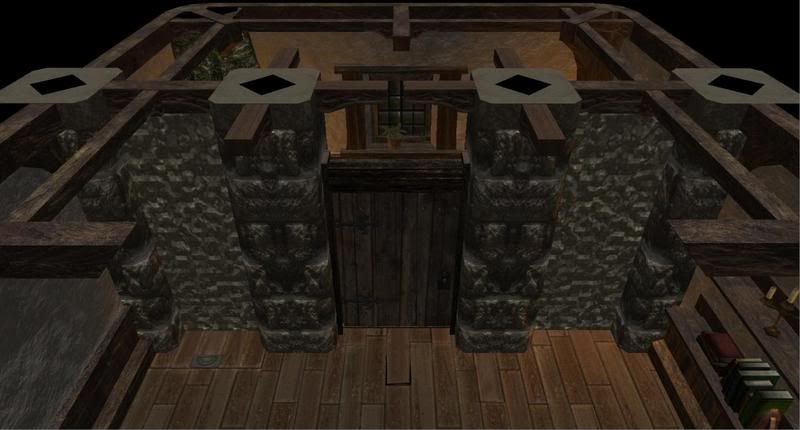
Make a third copy/paste of the "archive wall" and remember to group them together
Scale to (1, 0.2, 0.3) and place over the door and heightlock
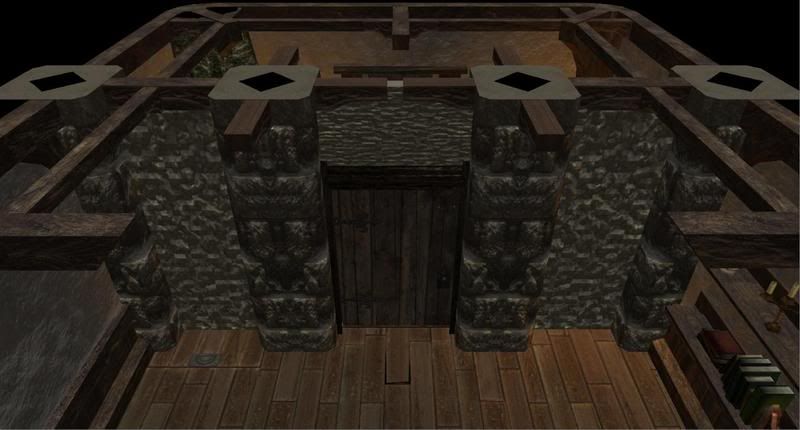
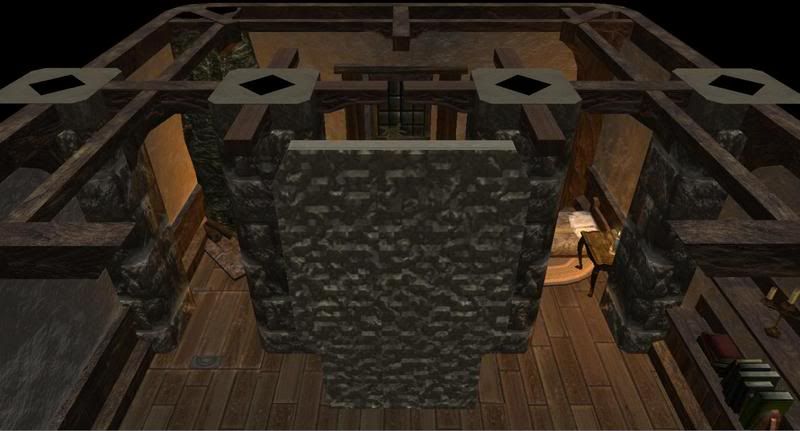
Notice the wooden wainscoting/baseboards in the standard interior tiles
Place three Shop Counter #2's
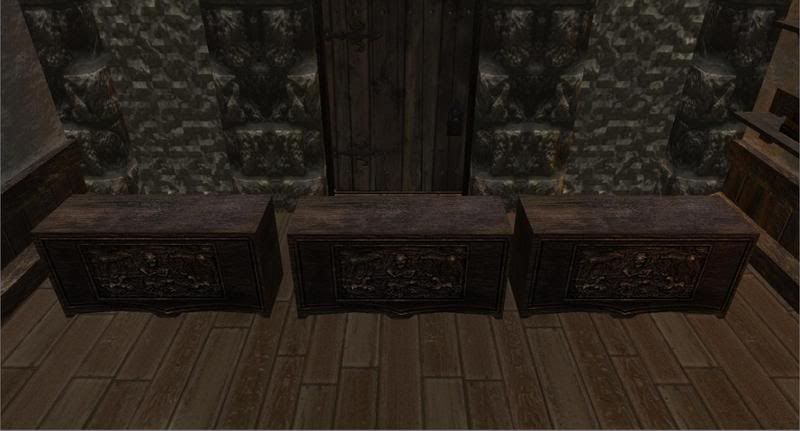
Scale the 1st (0.35, 2.5, 0.3)
Scale the 2nd (0.15, 2.5, 1)
Scale the 3rd (0.25, 2.5, 0.3) and raised the 3rd on the z-axis to 0.75 and heightlock it
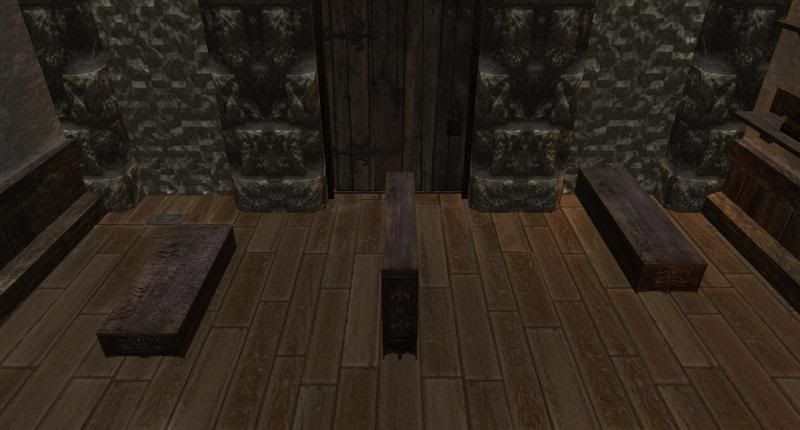
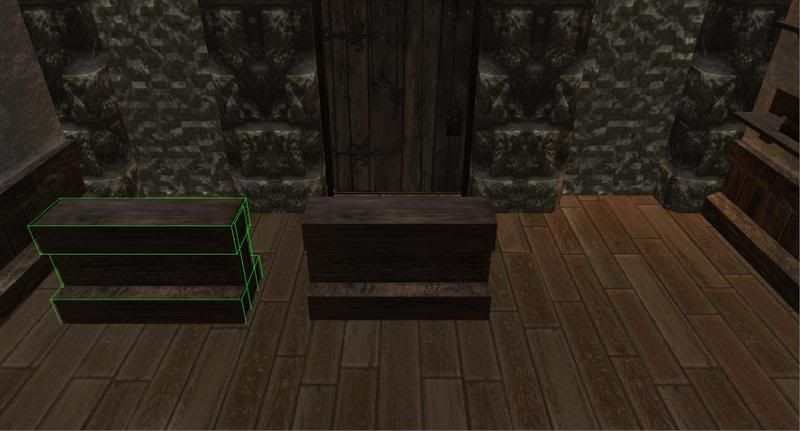
Combine the three pieces and group
Copy/paste and remember to group the three pieces of the new copy together
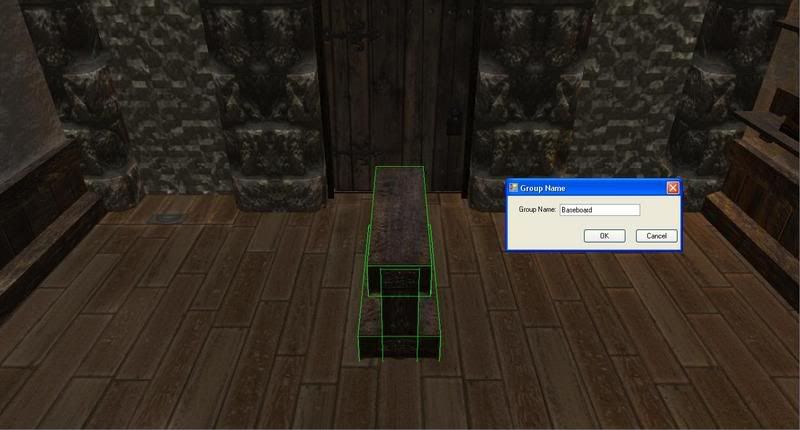
Place the baseboards in position
Set everything to Environmental
(Note: when you have a group selected and switch the property to environmental or placeable - it will Ungroup everything - this is why you always switch the property of all the objects before grouping)
Group everything - and heightlock everything
Export your prefab so you don't have to go through all this crap again!!!
Save the area and reload it and your prefab should now be at the bottom of the prefab list.
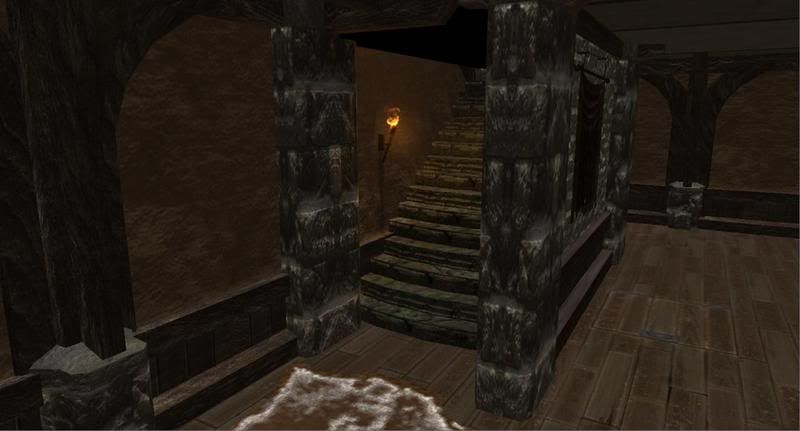
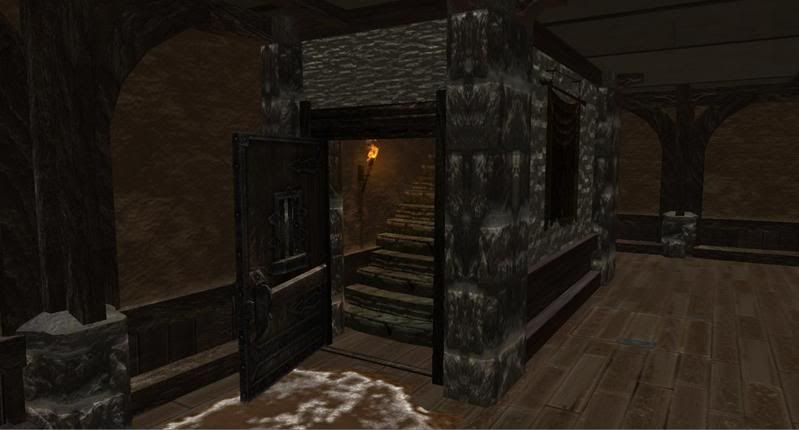
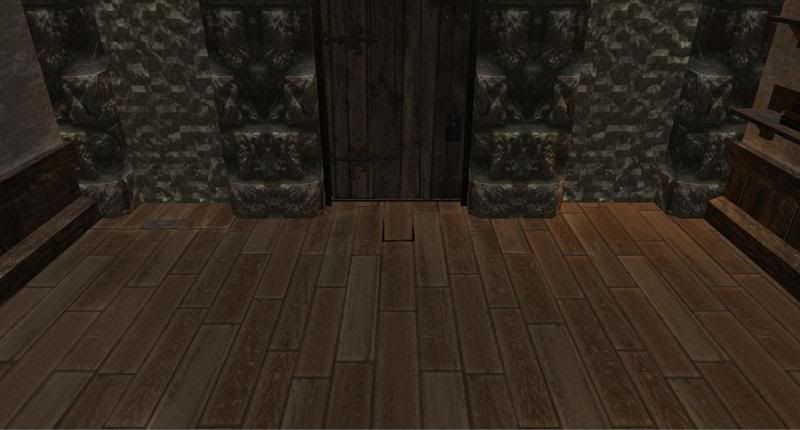
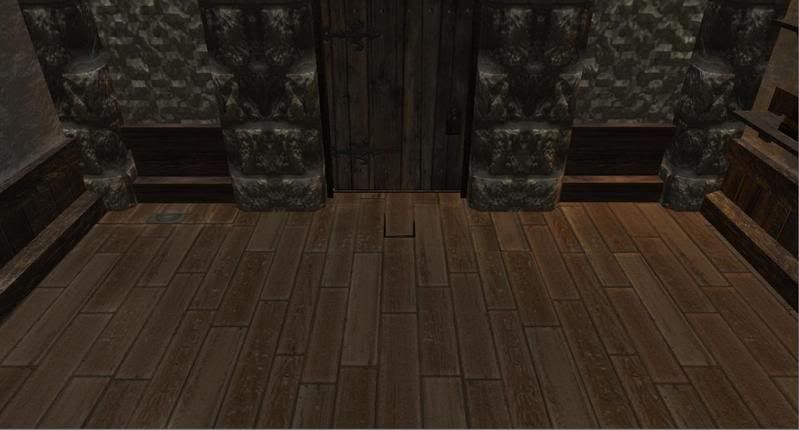
Here is the finished wall from inside the room
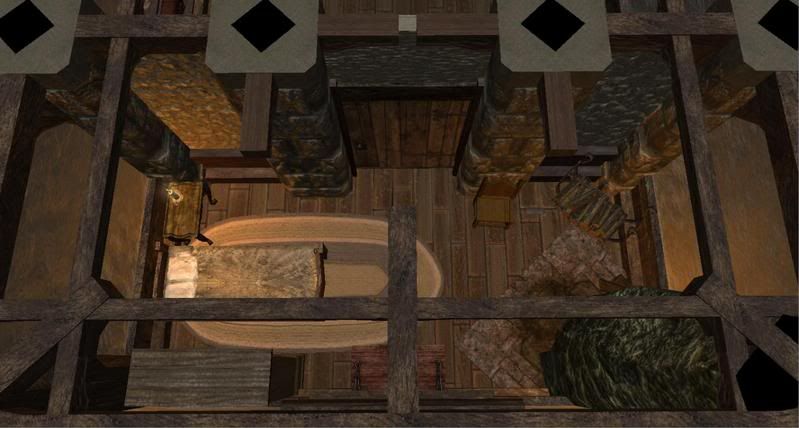
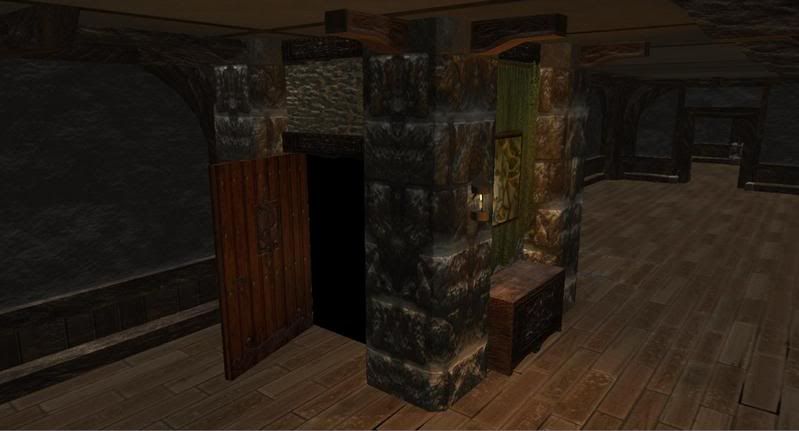
I created more walls to divide off the kitchen/foyer and a small storage room conveniently located near the kitchen and from door. Then I spent a few hours decorating. I decided to make it an artists small home.
TIPS:
@@@@ Imagine yourself living in the area - what would you need on a day to day basis? what special items reflect who you are?
@@@@ Using a set color palette for the obects in the area is an easy way to make it feel more cohesive - same or similar colors in the rugs, curtains, pillows, wall hangings, etc.
@@@@ If you are designing an area for a specific canon PC - be sure to get into his/her head and add things into the area that will express the essence of that PC. This emotional aspect of design is a definite springing off point for quests and PC development.
Here are some shots of my finished area:
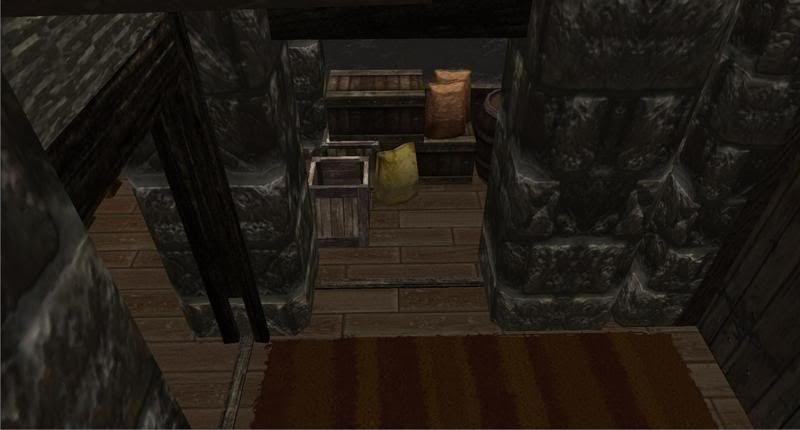
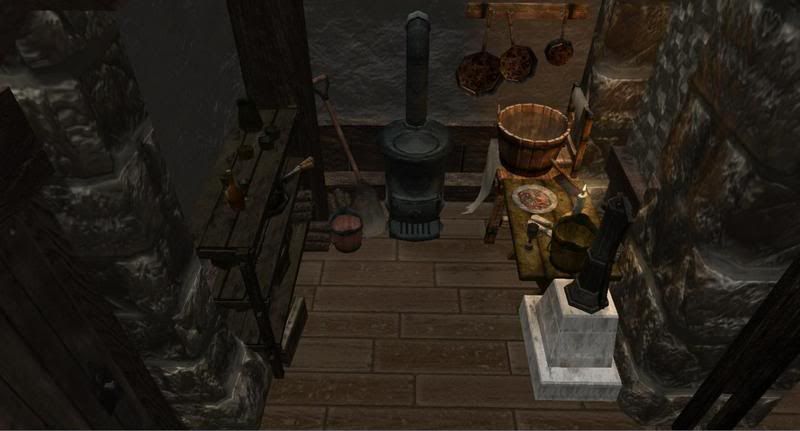
The storeroom - very close to the kitchen and easy delivery of those heavy crate and kegs because it is close to the front door
The kitchen - water pump into the bucket and a wash tub for dirty dishes - table for preparing food - shelves with cooking supplies - firewood for the stove - a shovel and bucket to scoop out the ashes - you wouldnt have a rug in the kitchen because it would always get wet and dirty and also catch on fire because of the proximity to the stove.
The living room - rug a safe distance from the fireplace - included another bucket and shovel for the ashes - to help rid the claustrophibic feeling in NWN2 interiors try to use the few tiles that have windows and also add curtains to give the feeling of windows. What is our NPC looking at?
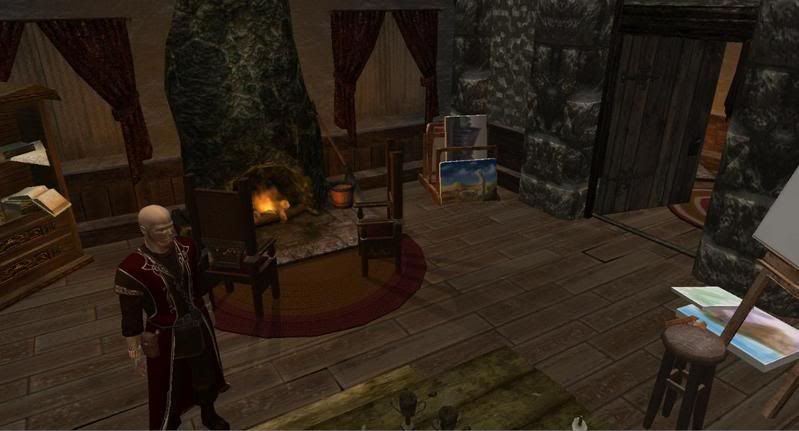
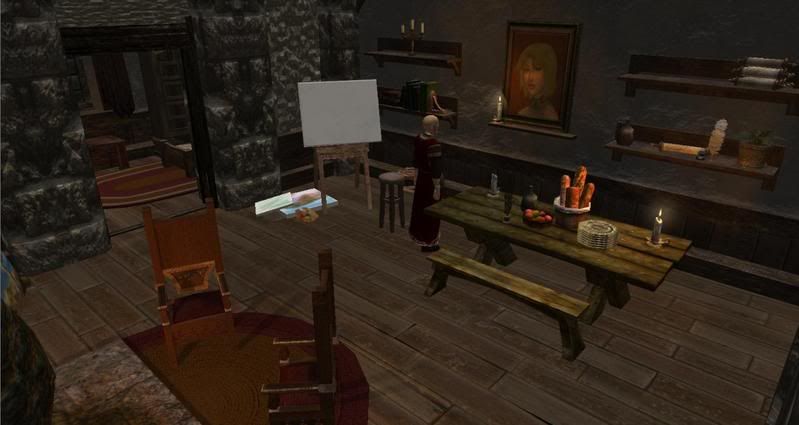
The dining room and studio area - here I threw in the emotional element - my aging artist only has one single painting hanging in his whole space - a votive candle sits below it - perhaps she is a long lost love - maybe his tragic muse. This is an element in the area that will add richness to the PCs experience - creating unanswered questions - maybe your PC will enter into a dialog with the NPC about the beautiful woman in the painting. He might then ask for your help in winning back the long lost love of his youth. Or he might tell you of her mysterious disappearance and give you a clue as to her possible whereabouts. This emotional element in the design becomes a springing off point for adventures.
And finally our cozy bedroom.
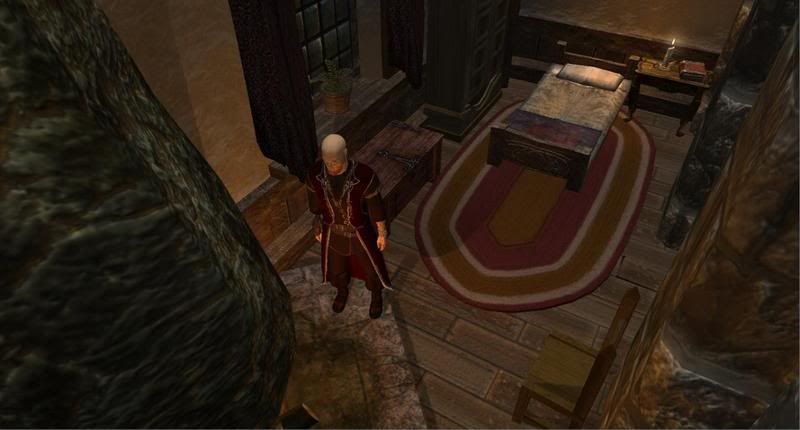
Our NPC stares at the fire thinking perhaps of the lost days of his youth. He changes into his sleeping clothes - hanging his robes in the armoire. He reads the novel on the bedstand for a short while before blowing out the candle and returning to the dark comfort of his dreams.